


How to Install a Cable Gland Properly
Proper installation of a cable gland is crucial for ensuring a secure, sealed connection that protects electrical equipment from dust, moisture, and mechanical strain. Whether you’re working in industrial, commercial, or residential settings, correct installation ensures the cable gland performs its intended function. This guide walks you through the key steps to install a cable gland correctly.

Step 1: Select the Right Cable Gland

Before installation, ensure you have the correct type and size of cable gland for your application. Consider factors such as:
-
Cable diameter
-
Environmental exposure (e.g., dust, water)
-
Material compatibility (plastic, brass, stainless steel)
-
IP rating requirements
Step 2: Prepare the Cable
Strip the outer insulation of the cable carefully without damaging the inner conductors. Remove just enough to allow the gland to grip the cable securely. Also, ensure the cable is free of debris, oil, or moisture.
Step 3: Disassemble the Gland

Most cable glands consist of several parts: the sealing nut, clamping insert, body, and locknut. Disassemble the components and identify their placement.
Step 4: Insert the Cable
Slide the gland parts onto the cable in the correct order. Start by sliding on the sealing nut, then the clamping insert.
Step 5: Fit the Cable into the Equipment
Insert the cable gland body through the entry hole in the enclosure or panel. Secure it with the locknut from the inside if necessary. Ensure the gland body is properly aligned.
Step 6: Tighten the Components
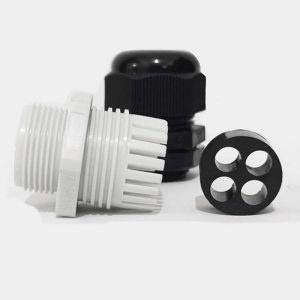
Push the cable into the gland body until it reaches the end. Then tighten the sealing nut by hand or with a wrench, as specified by the manufacturer. This compresses the sealing ring, creating a tight seal around the cable.
Step 7: Verify the Seal
Check that the gland is sealed tightly with no gaps or loose parts. The cable should not move freely, and the entry point should be well-protected from environmental factors.
Conclusion
Installing a cable gland properly is a straightforward process but requires attention to detail. Choosing the right gland, preparing the cable, and tightening each component securely ensures optimal performance. A well-installed cable gland protects electrical systems and helps prevent costly failures due to water or dust ingress.
